

Like with most Windows processes, you can manage Windows updates in multiple ways. Some are manual and tedious. Others involve few (if any) clicks and minimal brain power. Here, I’ll cover three ways to manage Windows updates across your fleet. Note that we’ll cover these processes in Windows 11 for simplicity’s sake.
Why do you need to manage Windows updates?
If you’re a sysadmin, there’s no doubt in my mind that you have a love-hate relationship with Windows updates. You need them to keep your devices secure — but as I know you know, automatic Windows updates have a way of breaking things.
Managing Windows updates means controlling which updates get installed across your devices — and when. Need to keep a legacy feature? Need more time to deploy the updates to your test environment? Managing Windows updates puts you in control of the update process.
How to manually manage Windows updates
The (extremely) manual process for managing Windows updates looks like this.
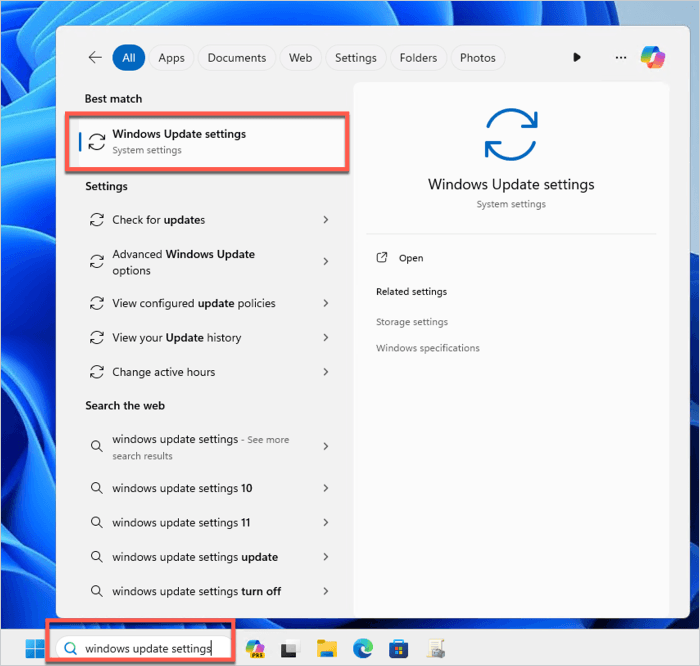
1. In the Search field of the taskbar, type windows update settings.
2. Then, click Windows Update settings in the results menu. The Windows Update panel should appear.


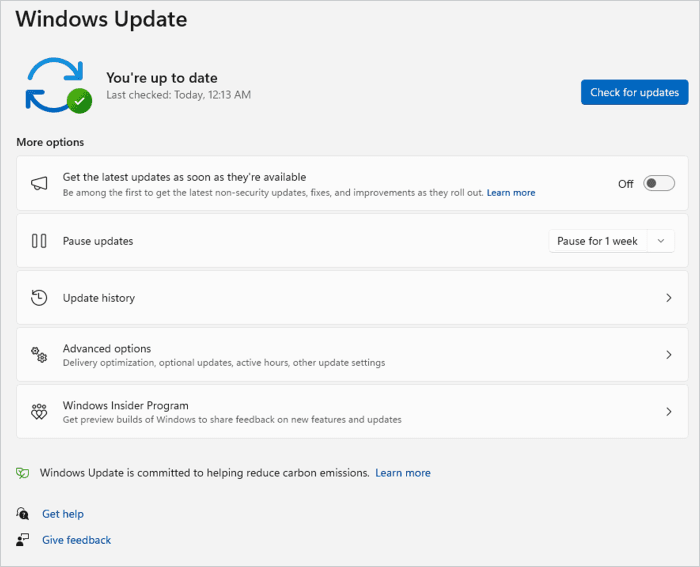
From here, the steps become a choose-your-own-adventure experience that’s dependent on what you want to accomplish. But here are a few settings we recommend checking in the Windows Update panel.
Get the latest updates as soon as they’re available. Music to your ears, right? Toggle that sucker off to give yourself some time to validate any updates before Windows automatically deploys them.
Pause updates. You can pause automatic updates for up to five weeks.
Update history. Did an update break something? No sweat! (Well, less sweat.) Hop into the update history to see which updates Windows applied recently. And, if needed, this is the place to go to uninstall any updates or fetch a recovery drive.
Advanced options. Here’s where you can dive into the nitty-gritty details of Windows updates. Set active hours and delivery optimization options, see configured update policies, and more.
Here’s the downside to this manual approach: You’ll need to do it for every single device in your fleet. Not a problem if you have just a handful of devices. But if you’re managing a fleet with hundreds or thousands of devices, managing Windows updates manually becomes unfeasible.
How to manage Windows updates with Group Policy
Managing Windows updates with Group Policy offers a couple of key benefits. First, it provides greater control over the patching process. Second, it enables you to manage Windows updates at scale. Using Group Policy Management Console, you can manage Windows updates for thousands of devices.
Here’s how to manage Windows updates with Group Policy.
For this walkthrough, you’ll need access to the Group Policy Management Console (GPMC) either on a Windows server or installed on a workstation using Remote Server Administration Tools (RSAT).
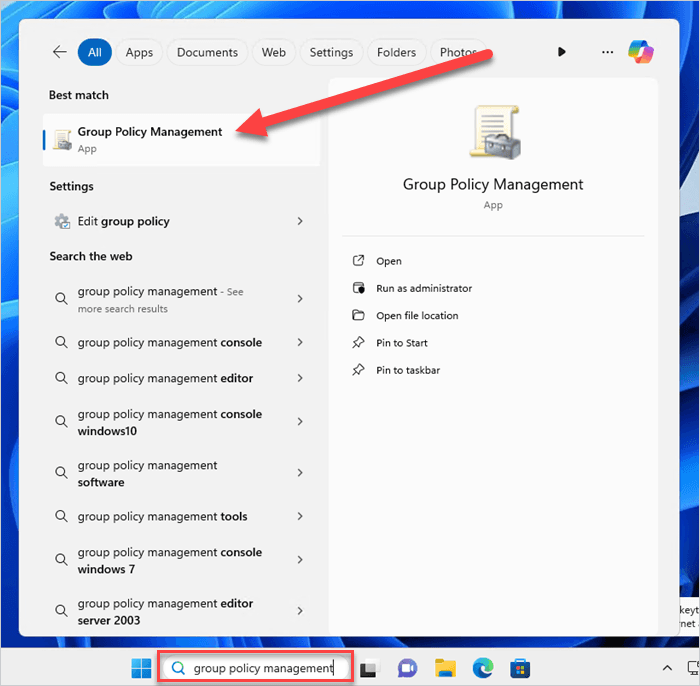
1. Launch Group Policy Management Console (GPMC) by searching for it in the Windows search bar.

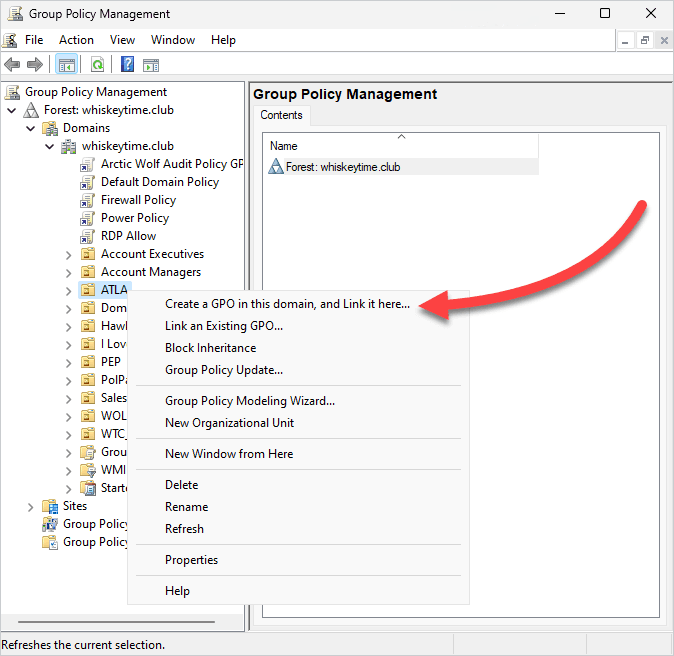
2. Right-click on the OU you want to apply the Group Policy Object (GPO), then click Create a GPO in this domain, and Link it here.

3. Give the GPO a name, then click OK.
4. Right-click on the newly created GPO, then click Edit.
At this point, you’ll find most of the settings you want to configure at Computer Configuration > Policies > Administrative Templates: Policy definitions > Windows Components > Windows Update. While we won’t be able to tell you the best policies to configure for your environment, here are some options to get you started:
Manage updates offered from Windows Server Update Service > Specify intranet Microsoft update service location: This setting is where you would point to your internal Windows Server Update Services (WSUS) to host and manage your Windows updates locally.
Manage updates offered from Windows Server Update Service > Do not connect to any Windows Update Internet locations: This setting blocks updates from Microsoft’s default internet update servers, forcing clients to use designated internal update servers. It may restrict clients from connecting to the Microsoft Store.
Manage updates offered from Windows Server Update Service > Automatic Update detection frequency: This sets the frequency at which Windows checks for available updates.
Manage updates offered from Windows Update > Select the target Feature Update version: This setting allows you to configure the Windows feature update version for clients to upgrade to and stay on. It limits clients from installing feature updates beyond what you have configured.
Manage end user experience > Configure Automatic Updates: This setting lets you configure how automatic updates are managed on endpoints.
Microsoft provides a pretty extensive list of the available Windows update policies on its website, but feel free to explore the various settings available through GPMC, which provides detailed descriptions of what each setting does.
How to manage Windows updates with SmartDeploy
I may be a bit biased, but SmartDeploy makes it easy to manage Windows updates — especially with our latest feature release, which adds even more ways to manage your patches.
You can manage Windows updates with SmartDeploy in a few different ways.
The computer management view
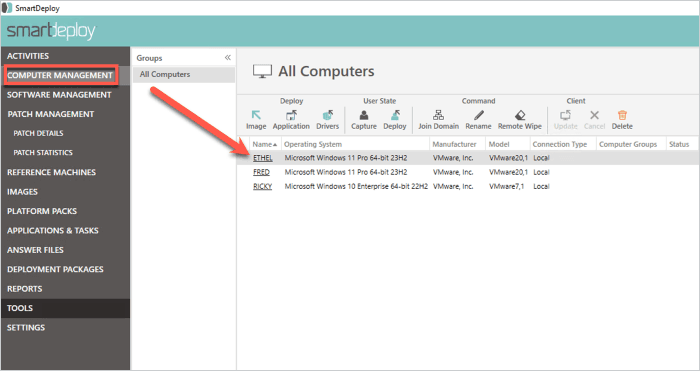
1. To access the computer management view in SmartDeploy, open the console and click Computer management.
2. Select a device.

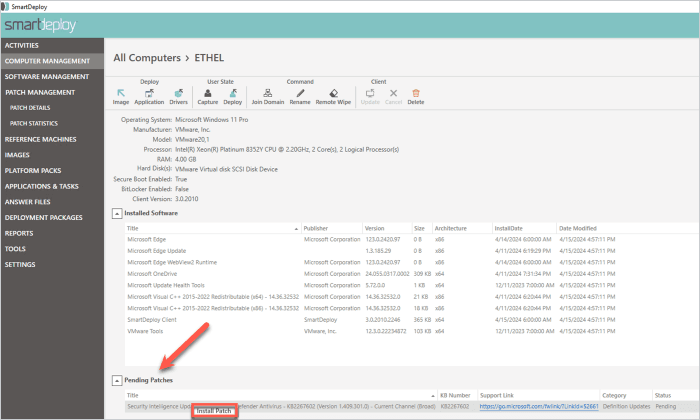
3. Click the drop-down button next to the Pending Patches table to view the available updates.
4. Right-click on the updates you want to deploy, then click Install Patch.

5. In the Install Windows Updates panel, configure your preferences for client communication, user deferment options, and deployment scheduling.

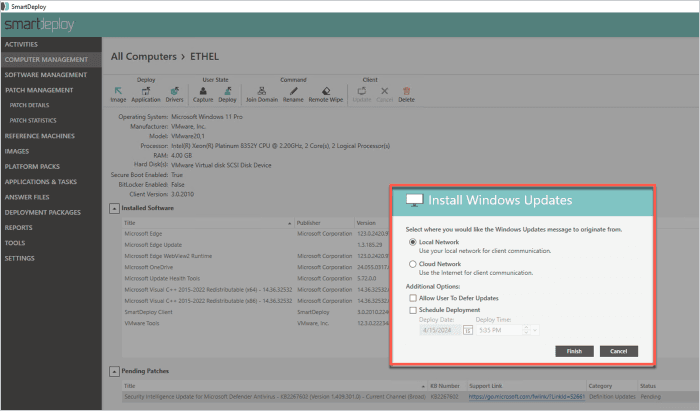
6. Click Finish.
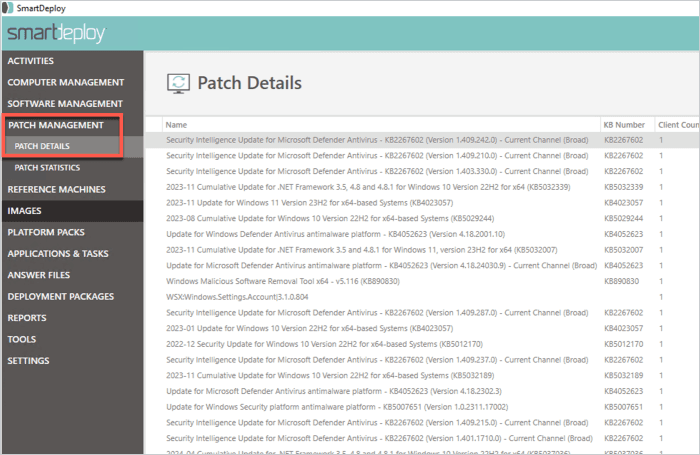
The patch details view
1. To access the patch details view in SmartDeploy, open the console and click Patch management.
2. Underneath Patch management, click Patch details.

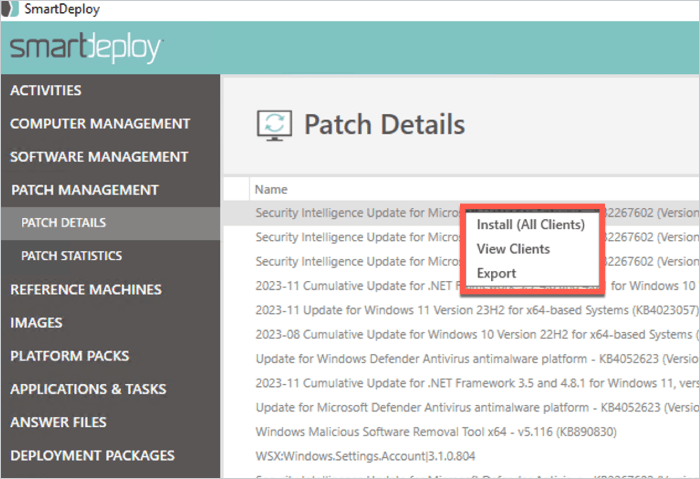
3. Right-click on the updates you want to install. You’ll have three options: Install (All Clients), View Clients, and Export.

Wondering which view is better? Well, it depends. (Didn’t see that coming, right? 😉)
I personally have a preferred view depending on the task at hand. When I need to focus on one device, I use the computer management view. But if I need to install a specific patch across multiple devices, I head straight for the patch management view.
Ready to simplify managing Windows updates? Sign up for a free trial of SmartDeploy to see just how easy keeping your devices up to date can be. (No, really!)